If you are someone who is a beginner in Git, this blog is for you. As a beginner, I will assume that you have Git installed in your system. If you don’t have it, you can get the latest version here for your operating system. In Linux, you can install it via your package manager. Once you've done that, create a GitHub account here. The next thing you have to be comfortable with is the command line and thirdly, we will create a simple repository consisting of a code file and a README.
Before we dig deeper, let me tell you what is Git?
· git init
Initializes a new repository.git init is a one-time command you use during the initial setup of a new repository
· git clone
To clone an existing repository. When executed, the latest version of the remote repository files on the master branch will be pulled down and added to a new folder
· git add
Add all new and changed files to the staging area.
· git commit
Record the changes made to the files to a local repository.It’s best practice to include a message with each commit explaining the changes made in a commit.
· git push
It sends local commits to the remote repository.
· git pull
To get the latest version of a repository run git pull. This pulls the changes from the remote repository to the local computer
· git log
To show the chronological commit history for a repository.
· git status
It returns the current state of the repository. If a file is in the staging area, but not committed, it shows with git status. Or, if there are no changes it’ll return nothing to commit, working directory clean.
These are some of the fundamental commands that we need to know before we begin using Git. There are more other advanced commands, but you won’t need them in the beginning. Before we actually begin, let’s tell git who you are. just mention your Git username and email address, since every Git commit will use this information to identify you as the author. Open your terminal and run these commands:
git config --global user.name "Your User_Name"
git config --global user.email "Your Email"
git config --global --list #To check the info you just provided

Now let’s start by initializing,
1. Create a local git repository
You need to create a new repository while creating a new project on your local machine using git. Open your terminal and navigate to where you want to place the project using the cd(change directory)command. For example, if you have a folder named ‘beginners_git’ in your home.
![]()
2. Add a new file to the repository

After creating or modifying the file, you can check the status by:
git status
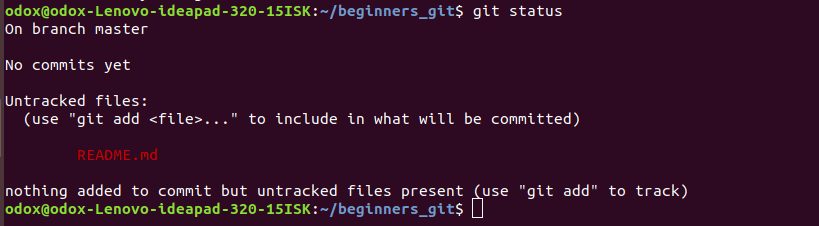
This above one indicates that once you have added a file in the folder containing a git repository, git will notice that changes have been made inside the repository. But unless we use the git add command there won’t be any official track of it. So use
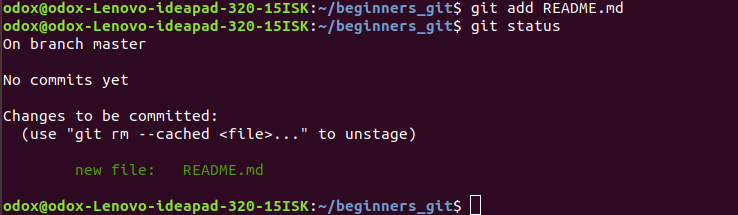
Likewise, you can add any files like PHP file, python file, etc of your code irrespective of programming languages.
![]()
Now suppose you just made a wrong commit or placed an unwanted file inside the repository or there is an error in the application, you can unstage the files you just added using:
git reset HEAD~1 # Remove the most recent commit
After this command, you can make whatever the changes you need, then add to staging and commit again
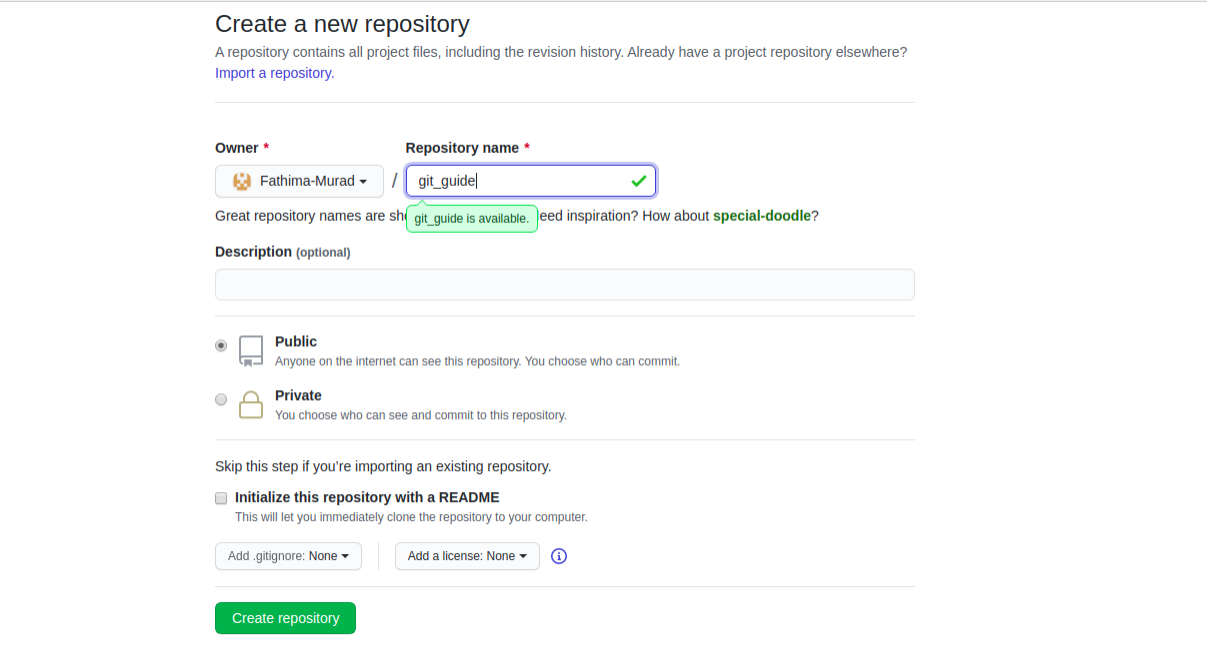
You’ll have an option there to initialize the repository with a README file, but no need to check it now. Fill the details and click Create Repository like below:
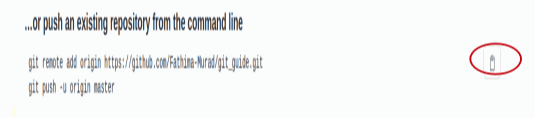

And now if we go and check our repository page on GitHub, it should look something like this:
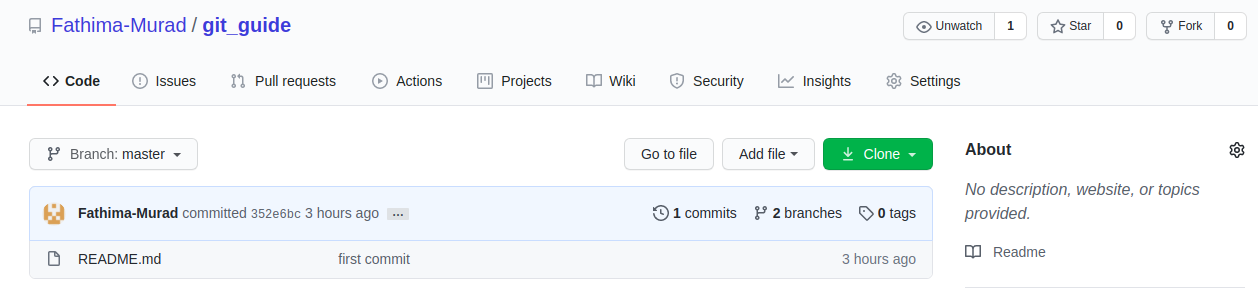
And that’s it..! You’ve just added the files to the repository you just created on GitHub.
Now let’s look at how do we download and work on other repositories on GitHub or How do we collaborate with our team...and make branches too?
Creating a branch
Now let’s try something advanced by creating git branches. For example,if you want to add a new code to your project you can create a new branch just for that code without affecting the main part of the project. Once you're done with the code, you can merge your changes from your branch into the master branch. When you create a new branch, Git keeps track of which commit your branch 'branched' off of, so it knows the history behind all the files.
To create a branch
git branch branch_name
To confirm the branch has been created use the git command:
git branch

Then checkout to that branch by:
git checkout branch_name
Now if you check the branch by git branch command, you could see an asterisk next to the branch we created, indicating that you are currently in that branch and you will make commits from there.
You can also use git checkout -b branch_name that will automatically create a new branch and then move you to that branch, off of the master branch.
git push origin your_branch_name
or
git push url_to_GitHub_repo your_branch_name
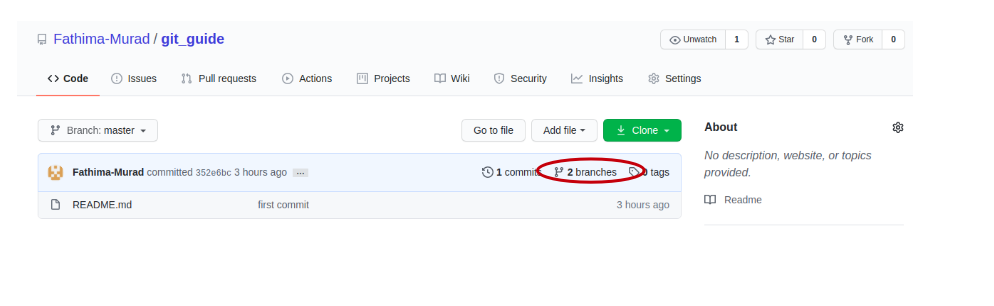
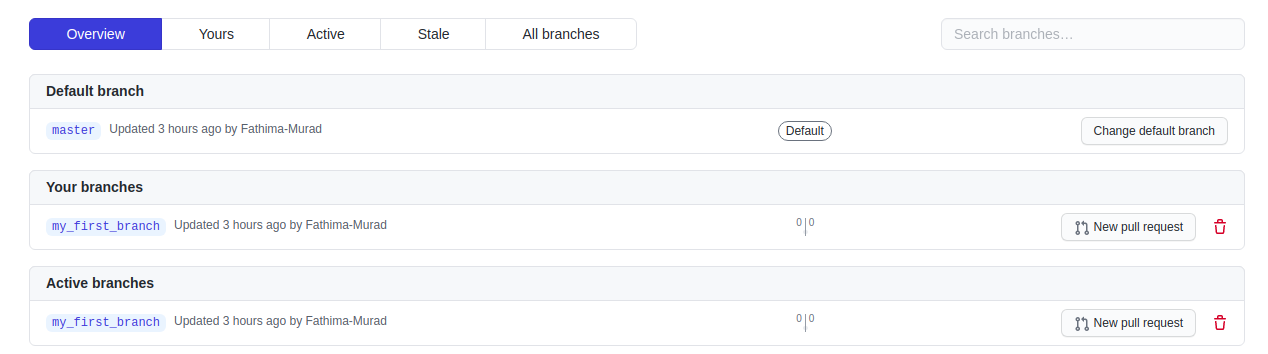
GitHub will automatically create the branch for you on the remote repository as like this:
Cloning a Git Repo
Locate to the directory you want to clone the repo. Copy the link of the repository you want and enter the following:
git clone url_to_Git_Repo_you_want_to_clone
When you clone, you will get the whole repository in your local. Then you can make the changes you want and then do
git add
git commit
git push
git pull origin master
Odox Soft Hub can help you with services provided in web designing, mobile app development, and many more. We provide the best Odoo services with 100% client satisfaction. For any queries drop your mail at info@odoxsofthub.com.To explore more about us feel free to get in touch with us.